type
status
date
category
slug
summary
Pinterest Topic
Pinterest Tag
Latest Pin Date
Latest Pin No.
Pin Image
Total Pin Images
All Pins Posted
All Pin Images Created
tags
icon
password
comment
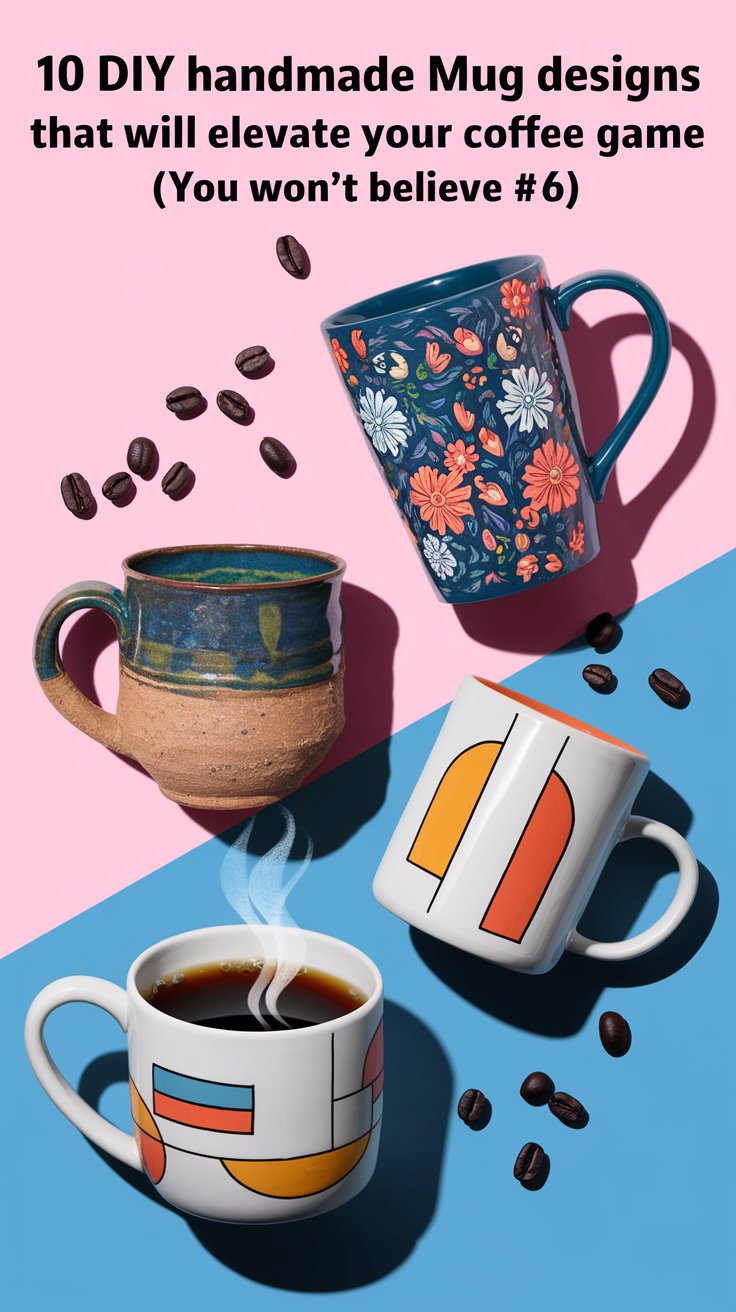
Okay, buckle up, buttercups, because we're about to dive headfirst into a world where your morning coffee mug isn't just a vessel for caffeine, but a glorious, handcrafted testament to your own darn creativity. Yes, friends, we're talking DIY handmade mug designs that will not only elevate your coffee game but might just make you the envy of every Zoom meeting you stumble into. And trust me, with #6, you'll be spitting out your (perfectly brewed, in your new mug) coffee in disbelief!
Let's be honest, in a world drowning in mass-produced sameness, your mug is your daily personality billboard. It's the first thing you reach for in the morning, the comforting companion during those afternoon slumps, and sometimes, let's face it, the only thing getting you through Monday. So why settle for a boring, beige blob when you can wield the power of DIY and create a mug that’s as unique and wonderfully weird as you are?
Now, before you start hyperventilating about needing to be the next Picasso, relax. We're not talking pottery wheels and kiln firings here (unless you're into that, in which case, kudos!). These are beginner-friendly, budget-conscious, and, most importantly, FUN projects that even the most creatively challenged among us can conquer. Think of this as therapy, but with more glue and significantly less crying (hopefully).
Ready to unleash your inner mug maestro? Let's dive into ten designs that are guaranteed to transform your coffee experience from "blah" to "BAM!"
1. The Terrazzo Dream Mug: For the Modern Minimalist (Who Secretly Loves Sprinkles)
Let's kick things off with a design that's as chic as it is deceptively simple: the Terrazzo Dream Mug. Terrazzo is all the rage in home décor right now, and for good reason. It's got that cool, modern, speckled vibe that screams "I have my life together," even if your sock drawer is currently a black hole of mismatched chaos.

What you'll need:
- A plain ceramic mug (dollar stores are your friend)
- Polymer clay in various colors (think pastels, neutrals, or go wild with neons!)
- A craft knife or blade
- Strong craft glue
How to make it magical:
- Clay Chaos: Condition your polymer clay by kneading it until it's soft and pliable. Then, roll out small pieces of different colored clays into thin snakes. Chop these snakes into tiny, irregular pieces – think confetti, but clay.
- Speckle and Stick: Randomly arrange these clay confetti pieces onto your mug. Don't overthink it; the beauty of terrazzo is its wonderfully imperfect nature. Gently press the clay pieces onto the mug to ensure they adhere slightly.
- Bake it 'til you make it: Follow the polymer clay baking instructions (usually around 275°F or 135°C for 15-20 minutes, but always check your clay packaging!). Let it cool completely.
- Seal the Deal: Once cooled, use a strong craft glue to go over the edges of the baked clay pieces to ensure they are securely attached to the mug, especially if any edges are lifting. This makes it more durable for washing (gentle hand wash, please!).
Why you'll love it: It's a subtle yet stylish upgrade that adds a touch of sophistication without being fussy. Plus, smashing clay into tiny bits is surprisingly therapeutic.
2. The Pressed Flower Fantasy Mug: For the Hopeless Romantic (and Flower Obsessed)
Calling all cottagecore enthusiasts and secret garden dreamers! This Pressed Flower Fantasy Mug is like capturing a tiny, delicate meadow and holding it in your hands every morning. It's sweet, it's charming, and it's guaranteed to make even instant coffee feel a little bit fancy.

What you'll need:
- A plain white or light-colored mug (ceramic or glass works best)
- Pressed flowers (you can buy them pre-pressed or, even better, press your own!)
- Mod Podge or a similar decoupage sealant
- A soft paintbrush
How to make it bloom:
- Flower Power: Arrange your pressed flowers on the mug to get a feel for the design. Delicate flowers and ferns work beautifully.
- Seal and Stick: Using your paintbrush, apply a thin layer of Mod Podge to the back of a pressed flower and gently place it onto the mug. Carefully brush another layer of Mod Podge over the top of the flower, sealing it to the mug. Repeat this process, layering flowers to create your desired design.
- Coat it all: Once your floral masterpiece is complete and the Mod Podge is dry, apply 2-3 more coats of Mod Podge over the entire decorated area, allowing each coat to dry completely in between. This will ensure your flowers are well-protected and your mug is (gently) washable.
Why you'll love it: It's a beautiful way to preserve the fleeting beauty of flowers and bring a touch of nature into your daily routine. Plus, it’s a great excuse to finally do something with those pressed flowers you’ve been hoarding in books (guilty!).
3. The Marbled Magic Mug: For the Bold and the Beautiful (and Slightly Impatient)
Okay, prepare to be amazed because this Marbled Magic Mug is ridiculously easy and produces seriously stunning results. We're talking swirling, vibrant, abstract art that looks like you spent hours meticulously crafting it, when in reality, it's all thanks to the magic of… nail polish!

What you'll need:
- A white ceramic mug
- Nail polish in a few of your favorite colors (the more vibrant, the better!)
- A disposable container filled with room temperature water (a plastic tub or even an old bowl works)
- Toothpicks or a skewer (optional, for swirling)
How to make it mesmerizing:
- Polish Prep: Fill your container with room temperature water. This is important – too cold and the polish will sink, too warm and it'll dry too fast.
- Drip and Dream: Quickly drip a few drops of each nail polish color onto the surface of the water. They should spread out and create a colorful film on top. You can use a toothpick to gently swirl the colors together for a more marbled effect. Work FAST, polish dries quickly!
- Dip and Dry: Wearing gloves (trust me on this one), quickly dip your mug into the water, rolling it to pick up the marbled polish pattern. Dip only the area you want marbled. Pull it out and admire the instant magic!
- Let it Breathe: Let the mug dry completely, upside down, on some paper towels. This can take several hours. The fumes can be strong, so ensure good ventilation.
Why you'll love it: Instant gratification! It's incredibly quick, surprisingly mess-free (if you're careful!), and the results are always unique and eye-catching. Just be sure to hand wash this beauty – nail polish and dishwashers are not friends.
4. The Drip Painting Delight Mug: For the Inner Child (Who Still Plays with Paint)
Remember the pure, unadulterated joy of drip painting as a kid? Well, guess what? It's just as fun as an adult, especially when you're applying it to a mug! The Drip Painting Delight Mug is all about embracing imperfection, letting go of control, and creating something joyfully messy and vibrant.

What you'll need:
- A white ceramic mug
- Acrylic paints in various colors (thinned slightly with water for better dripping)
- A well-ventilated workspace and some newspaper or drop cloth to protect your surfaces
How to make it drippy and dreamy:
- Prep and Protect: Set up your workspace with newspaper or a drop cloth. Turn your mug upside down on a raised surface (like a small jar or can) to allow paint to drip freely.
- Drip it Like it's Hot: Start dripping your thinned acrylic paints from the top rim of the mug, letting them cascade down the sides. Experiment with different colors and drip patterns. You can rotate the mug as you drip to create interesting effects.
- Layer it Up (or Don't!): You can let each layer of paint dry slightly before adding more colors for a layered effect, or go wild and drip all the colors at once for a more blended look. There are no rules in drip painting!
- Dry Time is Key: Let the mug dry completely, upside down, for at least 24 hours to ensure the paint is fully set. You can optionally bake the mug at a low temperature (check your paint instructions!) to make it more durable, but air-drying often works just fine for decorative mugs.
Why you'll love it: It's wonderfully freeing and expressive. No two drip-painted mugs will ever be the same, making yours truly one-of-a-kind. Plus, it's a fantastic way to use up those leftover acrylic paints you've been hoarding.
5. The "Punny" Mug: For the Dad Joke Enthusiast (and Coffee Addict)
Alright, pun lovers, this one's for you. The "Punny" Mug is all about injecting a daily dose of humor into your caffeine ritual. Because let's face it, sometimes a good (or groan-worthy) pun is exactly what you need to face the day. And you won't believe how easy #6 is! (Just kidding... mostly.)

What you'll need:
- A plain mug (any color works, but lighter colors show off the puns best)
- Oil-based paint pens or permanent markers (in your favorite colors)
- Inspiration for coffee puns (the internet is your oyster!)
How to unleash the puns:
- Pun-storming: Brainstorm your favorite coffee puns. "Espresso yourself," "Don't worry, be hoppy," "Life is brew-tiful," the possibilities are endless (and often delightfully cheesy).
- Sketch it Out (Optional): If you're feeling fancy, lightly sketch your pun onto the mug with a pencil first. This is helpful for spacing and centering.
- Pen to Mug, Let the Puns Flow: Carefully trace over your sketch or freehand your pun onto the mug using your paint pens or markers. Take your time and have fun with it! You can add little doodles or coffee bean illustrations to amp up the punny-ness.
- Bake for Keeps (Optional): To make your pun last longer, you can bake the mug according to the paint pen instructions. This usually involves baking at a low temperature for a set time and then letting it cool in the oven. Again, hand washing is recommended for longevity.
Why you'll love it: It's a guaranteed conversation starter (or eye-roller, depending on your audience). It's personal, it's funny, and it's a daily reminder that even Mondays can be tackled with a good pun and a strong cup of coffee.
6. The Constellation Creation Mug: For the Stargazer (and Midnight Coffee Sipper)
Okay, prepare to have your mind blown because this one is out of this world (pun intended!). The Constellation Creation Mug brings the beauty of the night sky right to your coffee cup. It's elegant, it's a little bit magical, and it's surprisingly simple to achieve.

What you'll need:
- A dark-colored mug (navy blue or black ceramic mugs work best for that night sky vibe)
- Gold or silver paint pen (metallic markers are key for that celestial shimmer)
- Constellation stencils (you can find these online or easily DIY them by printing constellation patterns and cutting them out)
- Optional: White pencil or chalk for lightly marking stencil placement
How to reach for the stars (on your mug):
- Stencil Strategy: Decide which constellations you want to feature on your mug. Lightly position your stencils on the mug and, if desired, lightly mark the stencil outlines with a white pencil or chalk (this is optional but can help with placement).
- Starry Strokes: Using your gold or silver paint pen, carefully fill in the stencil openings, creating your constellation patterns. Remove the stencil and repeat with other constellations, spacing them around the mug as you like.
- Twinkle, Twinkle: Add tiny dots of gold or silver paint around the constellations to represent extra stars and create a more realistic night sky effect.
- Set it in the Stars (Optional): Bake the mug according to your paint pen instructions to set the design and make it more durable. Hand washing is still your best bet to keep those constellations sparkling.
Why you won't believe #6: Because it looks SO incredibly intricate and professional, yet it's just stencils and a paint pen! Seriously, people will think you bought this at some fancy boutique. Prepare for compliments and gasps of amazement. And maybe a little bit of coffee-fueled cosmic inspiration.
7. The Washi Tape Wonder Mug: For the Pattern Obsessed (and Slightly Commitment-Phobe)
Washi tape, my friends, is the crafting world's best-kept secret weapon. It's colorful, it's patterned, it's repositionable (hallelujah for commitment-phobes!), and it's perfect for creating instant mug magic. The Washi Tape Wonder Mug is all about geometric patterns, clean lines, and effortless style.

What you'll need:
- A plain mug (white or a solid color works great)
- Washi tape in various colors and patterns (go wild!)
- Scissors or a craft knife
How to tape your way to mug perfection:
- Pattern Play: Plan your geometric design. Stripes, chevrons, polka dots, abstract shapes – let your inner pattern designer run wild!
- Tape it Up: Carefully apply strips of washi tape to your mug, creating your chosen pattern. Use scissors or a craft knife to trim the tape for clean lines and sharp angles. Overlap tapes or leave gaps – it's your design, your rules!
- Smooth it Out: Press down firmly on the washi tape to ensure it adheres well to the mug surface.
- Instant Upgrade: That's it! Seriously, that's all there is to it. Admire your instantly transformed mug.
Why you'll love it: It's the ultimate quick and easy mug makeover. No drying time, no baking, no mess. Plus, you can easily change up the design whenever you feel like a new pattern. Just peel off the old tape and create a fresh, new look! Hand washing is a must for this one to preserve the tape.
8. The Chalkboard Charm Mug: For the Ever-Changing Mood (and List Maker)
Are you someone who likes to switch things up? Someone who has a different quote or mood every day? Then the Chalkboard Charm Mug is your soulmate in mug form. It's interactive, it's customizable, and it's endlessly entertaining (especially if you like leaving passive-aggressive coffee requests for your roommates… just kidding… mostly).

What you'll need:
- A plain ceramic mug
- Chalkboard paint (specifically designed for ceramics and heat-safe if you plan to bake it)
- Chalk or chalk markers
How to make it a message board in mug form:
- Paint it Black (or Chalkboard Gray): Following the chalkboard paint instructions, apply 2-3 coats of chalkboard paint to the exterior of your mug, allowing each coat to dry completely in between. Leave the rim and inside of the mug unpainted for safety.
- Cure it Right: Some chalkboard paints require a curing process, which usually involves lightly rubbing chalk over the painted surface and then wiping it off. Check your paint instructions for specific curing directions.
- Message Mania: Once cured, your mug is now a mini chalkboard canvas! Use chalk or chalk markers to write quotes, draw doodles, leave yourself reminders, or unleash your inner artist.
- Wash and Repeat: To change your message, simply wipe the chalkboard surface clean with a damp cloth and start fresh.
Why you'll love it: It's endlessly versatile and fun. You can personalize it daily, use it for to-do lists, or even let guests write their names on their mugs at parties (fancy!). Plus, there's something undeniably charming about a chalkboard mug.
9. The Fabric Cozy Mug: For the Comfort Seeker (and Sewing Newbie)
Okay, maybe painting and taping aren't your jam. Maybe you're more of a cozy-up-with-a-blanket-and-a-good-book kind of crafter. Fear not, my friend, because the Fabric Cozy Mug is here to wrap your mug in a warm, huggable embrace. It's practical, it's adorable, and it's a fantastic beginner sewing project.

What you'll need:
- A plain mug
- Fabric scraps (flannel, fleece, or even old sweaters work wonderfully)
- Scissors
- Needle and thread or a sewing machine (if you're feeling ambitious)
- Buttons, ribbons, or other embellishments (optional)
How to sew a hug for your mug:
- Measure and Cut: Measure the circumference and height of your mug. Cut a rectangle of fabric that's slightly larger than your mug's circumference and tall enough to cover the desired height of the mug. Add extra for seam allowance (about an inch on each side).
- Sew it Seam-ple: Fold the fabric rectangle in half lengthwise, right sides together, and sew along the long edge to create a tube.
- Hem it Up: Hem the top and bottom edges of the fabric tube for a clean finish.
- Button it (or Tie it) Up: Attach a button and a loop of elastic or ribbon to the edges of the cozy so you can easily fasten it around your mug. Alternatively, you can add ties instead of a button.
- Cozy Up! Slip your fabric cozy onto your mug and enjoy the extra warmth and tactile goodness.
Why you'll love it: It's functional and fashionable! It keeps your coffee warmer for longer, protects your hands from hot mugs, and adds a touch of homespun charm to your coffee break. Plus, it's a great way to use up fabric scraps and practice your basic sewing skills.
10. The Sharpie Scribble Mug: For the Doodler (and Last-Minute Gift Giver)
Sometimes, simple is best. And sometimes, you need a DIY project that you can literally whip up in five minutes before your friend's birthday brunch. Enter the Sharpie Scribble Mug – the epitome of easy, breezy, and beautifully imperfect.

What you'll need:
- A white ceramic mug
- Oil-based Sharpie markers (black is classic, but go colorful if you dare!)
- Your imagination and a willingness to embrace the doodle
How to scribble your way to mug happiness:
- Doodle Dive: Grab your Sharpie and just start doodling! Abstract patterns, whimsical creatures, geometric shapes, inspirational words – let your hand move freely and see what emerges. Don't worry about perfection; the charm is in the spontaneity.
- Layer it On (Optional): You can layer different colors of Sharpies to add depth and dimension to your doodles.
- Bake it to Last (Recommended): To make your Sharpie doodles permanent, bake the mug according to the Sharpie instructions (usually around 350°F or 175°C for 30 minutes, then cool in the oven). This will help set the ink and make it (more) dishwasher safe – though hand washing is still kinder to your art.
Why you'll love it: It's incredibly low-pressure and fun. It's a fantastic way to personalize a mug in minutes, making it perfect for last-minute gifts or just a quick creative fix. Embrace the scribble, and let your inner artist (or inner child) run wild!
Elevate Your Coffee Game, Elevate Your Life (One Mug at a Time)
So there you have it, folks! Ten DIY handmade mug designs to transform your daily coffee ritual from mundane to magnificent. Whether you're a fan of minimalist chic, floral fantasy, bold colors, or pun-tastic humor, there's a mug makeover here for you.
The best part? These aren't just mugs; they're little pockets of joy, handcrafted reminders that you are creative, capable, and definitely deserve a damn good cup of coffee in a mug that's as awesome as you are.
Now go forth, grab a plain mug (or ten!), unleash your inner DIY diva, and prepare to elevate your coffee game (and maybe even your life) one handmade mug at a time. And don't forget to tell me in the comments which design is your favorite – and which one you absolutely won't believe is #6! (Okay, okay, I'll stop teasing about #6 maybe.)
上一篇
11 Work Earrings Trends That Will Keep You Looking Polished in the Office!
下一篇
16 Inspiring Luxury Office Designs That Will Make You Excited to Work from Home!
Loading...


